# OpenCart 3 & 4 Extension Guide
Plugin version 2.5.2, 20.11.2025
Here at Inbank we strive to help our partners sell more by simplifying purchases and making financing more accessible to customers. For exactly this reason we offer a number of buy-now-pay-later solutions.
The Pay Later Platform by Inbank connects partner e-shops with our e-POS solution. With e-POS, partners only need to add Inbank as a payment method and Inbank will take care of all the rest. Customers are redirected to the e-POS environment to complete the financing of the purchase. After a successful financing process we redirect the customer back to you.
Inbank e-POS is supplemented with Inbank Partner Portal where merchants can see the overview of submitted credit applications, create applications for customers and conduct contract withdrawals.
If you have any questions regarding the Inbank OpenCart extension, just contact us and we will be happy to help:
- Estonia - integration@inbank.ee
- Poland - integration@inbank.pl
- Latvia - integration@inbank.lv
- Czech Republic - integration@inbank.cz
- Lithuania - integration@inbank.lt
The Pay Later Platform by Inbank has been tested with the Default Store Theme (designed by the OpenCart team) and OpenCart versions 3.0.0, 3.0.3.6, 3.0.3.8, 3.0.3.9, 3.0.4.0, 4.0.2.x, 4.1.0.0.
The Pay Later Platform by Inbank includes storefront content translations for the following languages Estonian, Polish, Latvian, English, Czech, Russian and Lithuanian.
The Pay Later Platform for Opencart gives merchants access to the following Inbank products:
You can find the list of available Inbank products [here](#listofproducts).
# Changelog
|**Version**|**Date**|**Updates**|
| :- | :- |:- |
| 2.1.0 | 09.12.2024 | Added support for OpenCart 4 and Inbank Hire Purchase Lithuania payment product.|
| 2.1.1 | 21.05.2025 | Updated LT calculation logic.|
| 2.2.0 | 17.06.2025 | Added Inbank Moki Lithuania payment product.|
| 2.3.1 | 06.08.2025 | Added Inbank HP Flex product for EE and LV.|
| 2.3.2 | 18.09.2025 | Added Changes to Moki1 product.|
| 2.4.0 | 22.09.2025 | Added Inbank HP Flex product for PL.|
| 2.5.0 | 01.10.2025 | Removed Inbank Pay next month product.|
| 2.5.2 | 24.10.2025 | Bugfixes.|
# Installation Prerequisites
As a preparatory step before installing the Pay Later Platform extension, you need to install the following extensions to your OpenCart store:
vQmod
The extension is used for storefront customizations included in the Pay Later Platform. Make sure you install the latest release of vQmod, which is available here.
vQmod installation is performed via your hosting upload capabilities (FTP, SSH, CPanel). The installation instructions can be found here. Please pay special attention when setting permissions.
If you run into some issues when installing vQmod, the following resources may be helpful in resolving them: OpenCart forum and vQmod repository discussion.
Install 'OC 3.X.X.X Installation Issue Fix' extension
The extension fixes the modification upload error which may appear in OpenCart 3.
You can install the extension by uploading the file available here. After the installation, make sure to go to Extensions > Modifications menu and click Clear and Refresh.
Cron Jobs
You need cron jobs configured for your OpenCart instance for running scheduled tasks automatically.
- You can use easycron.com or cron-job.org to set up your cron jobs.
- Alternatively, you can install 'Cron Jobs for Opencart 3.0.* and 2.3.*' by uploading the file available here. After the installation, make sure to go to Extensions > Modifications menu and click Clear and Refresh. You also need to enable the Cron Jobs extension in the Extensions > Extensions > Modules list.
'OCMod Vqmod modifications fix' extension
The extension fixes an issue which has been found in OpenCart 3 and affects the functionality of the Pay Later Platform.
You can install the extension by uploading the file available here. After the installation, make sure to go to Extensions > Modifications menu and click Clear and Refresh.
# Installation
You can download the latest version of the extension from here:
- [version 3.0.0](/payment-modules/opencart/oc3/inbank.ocmod.zip) build compatible with OpenCart 3.0.0, 3.0.3.6, 3.0.3.8, 3.0.3.9, 3.0.4.0
- [version 4.0.0](/payment-modules/opencart/oc4/inbank.ocmod.zip) build compatible with OpenCart 4.0.2.x, 4.1.0.0
To install the Pay Later Platform extension you just need to follow these steps:
1. In the back office of your shop, go to Extensions > Installer section.
2. Click the Upload button in the 'Upload your extension' section of the page.
3. Select the .zip package containing the extension in the window that appears. The extension will then be uploaded to your system.
4. Go to the Extensions > Modifications menu and click Clear and Refresh.
5. Go to the System > Users > User Groups > Administrator section and enable all _Access_ _permissions_ and _Modify permissions_. Click the Save icon to apply changes.
6. Refresh cache by going to Dashboard > Gear icon and clicking the Refresh button next to each of the cache types.
And that is it! The Pay Later Platform is now ready for configuration.
# Extension Overview Page
After successful installation of the Pay Later Platform by Inbank, you can configure Inbank products as payment methods in your back office.
The Pay Later Platform configuration is done at Extensions > Extensions > Payments > Pay Later Platform by Inbank.
The extension includes the following Inbank payment methods:
- Inbank Hire Purchase Estonia
- Inbank Split into parts Estonia
- Inbank Hire Purchase Poland
- Inbank Hire Purchase Latvia
- Inbank Split into parts Latvia
- Inbank Hire Purchase Czech Republic
- Inbank Hire Purchase Lithuania
- Inbank Moki Lithuania
- Inbank HP Flex Estonia
- Inbank HP Flex Latvia
- Inbank HP Flex Poland
The extension overview page at Extensions > Extensions > Payments > Pay Later Platform by Inbank includes the list of all the Inbank payment options added.
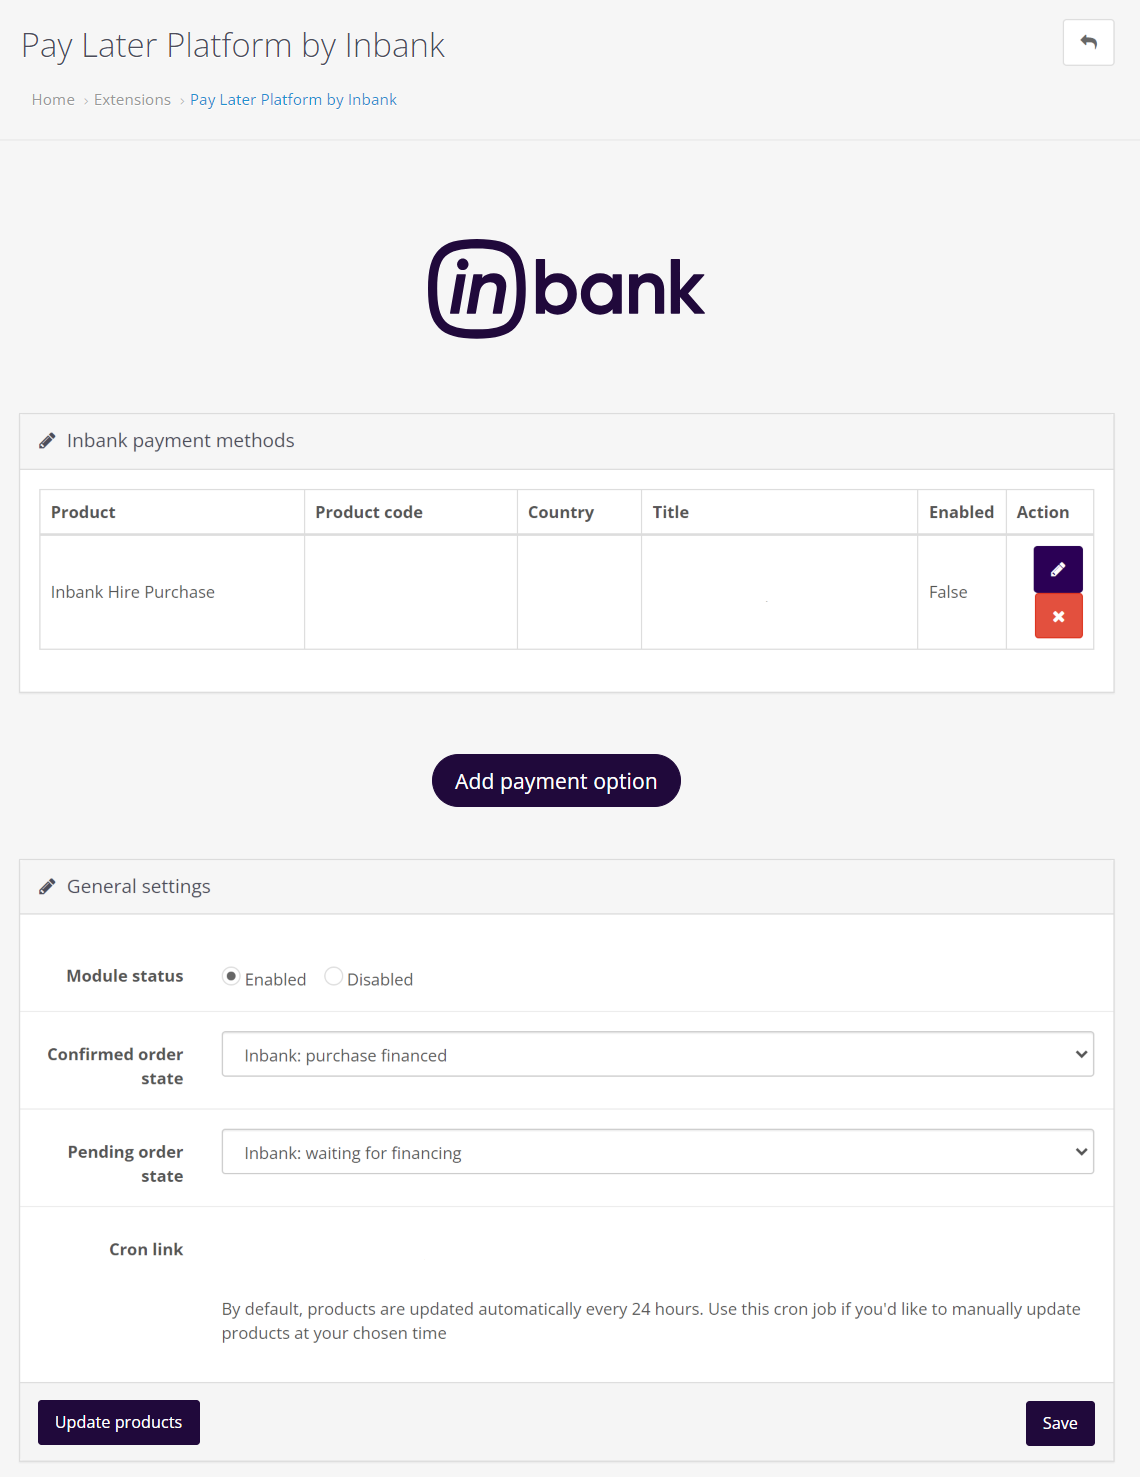
Here several actions regarding added payment options are available:
- Click Edit next to a payment option to make changesto it's configuration.
- Click Delete next to a payment option to delete it.
On the extension overview page you can also change the statuses used by the extension to better fit your business logic.
In the General Settings section you can customize which statuses the extension sets for:
- Confirmed order state - for cases when the purchase was successfully financed by Inbank
- Pending order state - for cases when the purchase is awaiting financing by Inbank
By default the data retrieved from Inbank over API is updated every 24 hours. If you would like to run the data update at a different interval, the General Settings section includes the cron job link which can be used for that. We recommend updating data once every 24 hours, from 00:00 AM to 06:00 AM.
Additionally, under the General Settings section you can click the Update products button for a one-time product data update at any time you'd like.
# Adding New Payment Options
New payment options are added via clicking the Add Payment Option at Extensions > Extensions > Payments > Pay Later Platform by Inbank.
Depending on the Inbank branch(es) you are cooperating with, you need to configure the payment products for Estonia, Poland, Czechia, Latvia or Lithuania. You can offer one of the available products or several, depending on the agreement you have with Inbank.
The following configuration parameters are predefined by Inbank:
- Title
- Maximum order amount
- Minimum order amount
- Period
- Additional details
Note that the predefined values will be updated if they change on the Inbank side. The exceptions are the Title and Additional details values which are customizable. The Title and Additional details are updated if set to default, but are not updated if they have been customized.
For more information on updates, refer to the [Updates](#updates) section.
Adding a new Inbank payment method to the extension configuration is a simple two-step process.
On step 1 you need to set the keys and product code required for the functioning of the extension and the mode in which this payment product is to be available: live or test.
Inbank representatives will provide you all the data required for this step. Make sure to fill in all the fields correctly, as they are essential to the configuration of Inbank payment products.
On step 2 you can review your configuration and set a couple additional options available in the extension.
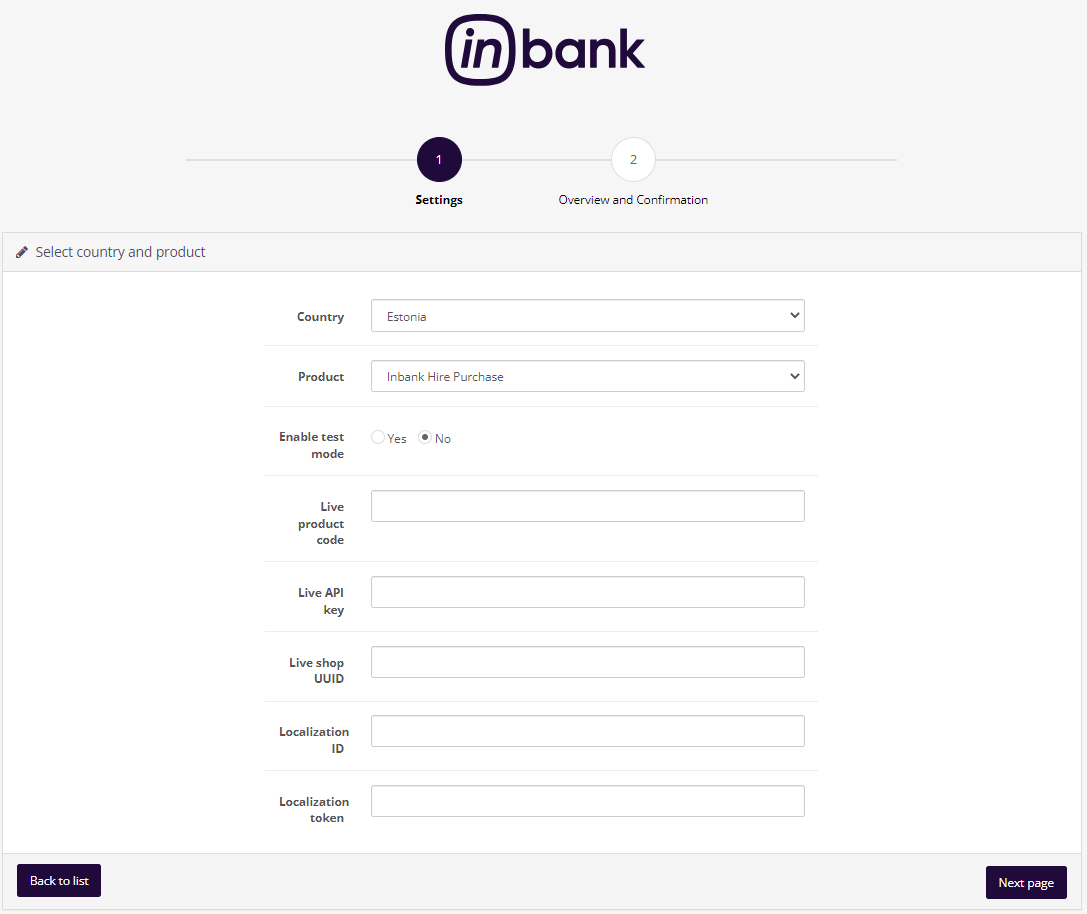
## Step 1: Settings
To start adding a new Inbank payment product, click Add Payment Option at Extensions > Extensions > Payments > Pay Later Platform by Inbank.
Configuration settings are similar for all payment products: Inbank Hire Purchase Estonia, Inbank Split into parts Estonia, Inbank HP Flex Estonia, Inbank Hire Purchase Poland, Inbank HP Flex Poland, Inbank Hire Purchase Czech Republic, Inbank Hire Purchase Latvia, Inbank Split into parts Latvia, Inbank HP Flex Latvia, Inbank Hire Purchase Lithuania and Inbank Moki Lithuania.
The product code set during configuration defines the credit conditions available to customers and also automatically sets the following parameters:
- Title
- Maximum order amount
- Minimum order amount
- Period
- Additional details
Step 1 includes the essential parameters needed for the payment option setup. Inbank representatives will provide you all the information needed at this step.
After you add the necessary data, click Next to proceed to step 2 where you review the configuration and can set a number of additional parameters for the payment option.
|**Field**|**Description**|
| :- | :- |
| Country | The market for which you wish to add an Inbank payment method.
Available options: Estonia, Poland, Czech Republic, Latvia, Lithuania.|
| Product | The payment product you wish to add. The section depends on the Country:
- Estonia - Inbank Hire Purchase, Inbank HP Flex, Inbank Split into parts
- Poland - Inbank Hire Purchase, Inbank HP Flex
- Latvia - Inbank Hire Purchase, Inbank Split into parts, Inbank HP Flex
- Czech Republic - Inbank Hire Purchase
- Lithuania - Inbank Hire Purchase, Inbank Moki |
| Enable test mode | Select whether the extension should be connected to test API for testing purposes. If this parameter is not enabled, the extension connects to the live API.
This parameter defines whether next you need to set the API key, UUID and product code for the live or test environment.
By default, test mode is disabled, but the setting can be customized.|
| Live product code / Test product code | The product code provided by Inbank. This code defines the credit conditions offered at checkout.|
| Live API key / Test API key | The unique key of the shop used for building API requests through which the shop communicates with Inbank.|
| Live shop UUID / Test shop UUID | The API authentication key. The API key should be kept private.|
| Localization ID | ID of the set of translations required for the extension. Translations are available in Estonian, Polish, English, Latvian, Czech, Russian and Lithuanian.|
| Localization token | Token required to access the translations for storefront texts.|
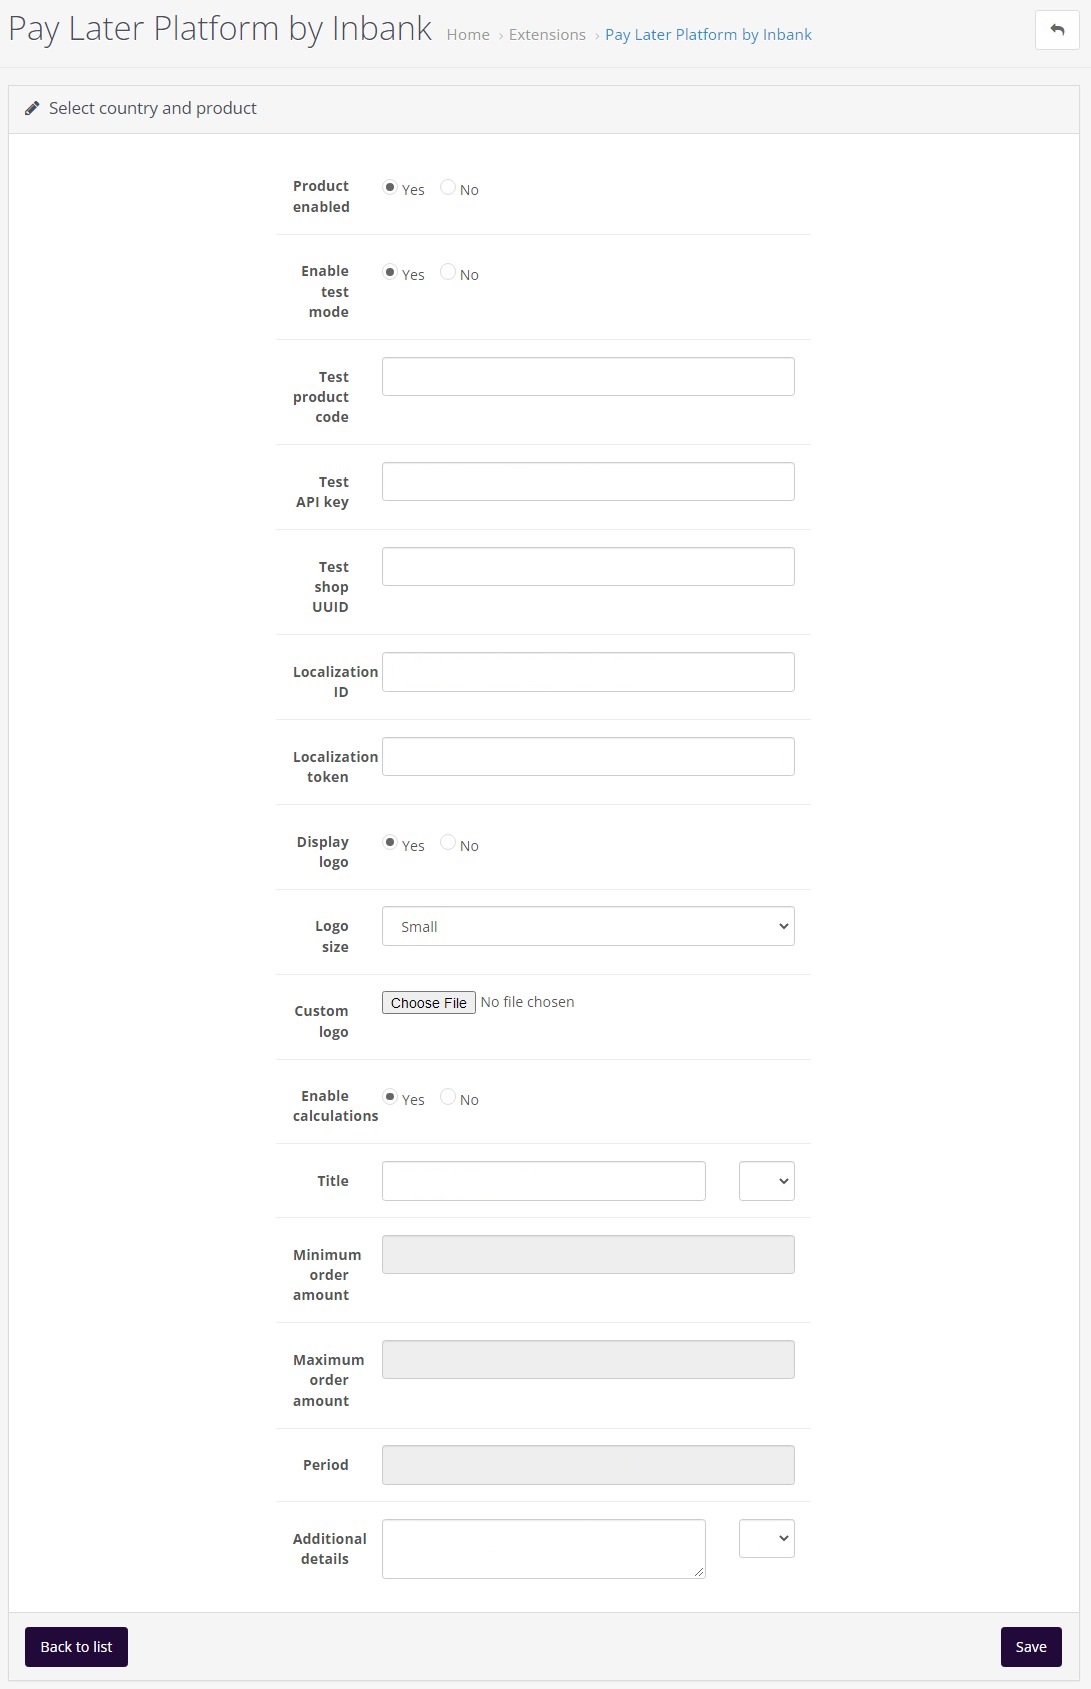
## Step 2: Overview and Confirmation
Step 2 lets you review the payment option configuration and includes a number of additional parameters which can be configured for Inbank payment methods.
|**Field**|**Description**|
| :- | :- |
| Payment enabled | Whether this Inbank product appears as a payment method at checkout.|
| Enable test mode | Select whether the extension should be connected to test API for testing purposes. If the parameter is not enabled, the extension connects to the live API.
This parameter defines whether next you need to set the API key, UUID and product code for the live or test environment.|
| Live product code/Test product code | The product code provided by Inbank. This code defines the credit conditions offered at checkout.
This parameter is prefilled from Step 1 , but you can change the Product Code here if needed.|
| Live API key / Test API key | The unique key of the shop used for building API requests through which the shop communicates with Inbank.
This parameter is prefilled from Step 1 , but you can change the API key here if needed.|
| Live shop UUID / Test shop UUID| The API authentication key. The API key should be kept private.
This parameter is prefilled from Step 1 , but you can change the UUID here if needed.|
| Localization ID | ID of the set of translations required for the extension. Translations are available in Estonian, Polish, English, Latvian, Czech, Russian and Lithuanian.
This parameter is prefilled from Step 1 , but you can change the Localization ID here if needed.|
| Localization token | Token required to access the translations for storefront texts.
This parameter is prefilled from Step 1 , but you can change the Localization token here if needed.|
| Display logo | Whether the payment method logo will be displayed next to the title at checkout.
By default the logo is enabled, but the setting can be customized.|
| Logo size | The size of the payment method logo which is displayed next to the title at checkout. The logo will be displayed only if the Use Logo parameter is set to Yes.
Available size options are Small and Medium.
The default value is Small, but the setting can be customized.|
| Custom logo | A custom logo for the payment method which will be displayed next to the title at checkout. If the custom logo is removed, the default logo will be applied. |
| Enable calculations | Whether calculated monthly amounts should be presented on product pages. When enabled, preliminary calculations of monthly payments will appear on the pages of products within the minimum-maximum range for this Product code.|
| Title | The payment method title that is displayed to customers at checkout. The recommended Title length is 65 characters.
The default Title is defined by the Product code. You can customize it for Inbank Hire Purchase Estonia, Inbank HP Flex Estonia, Inbank Hire Purchase Poland, Inbank HP Flex Poland, Inbank Hire Purchase Czech Republic, Inbank Hire Purchase Latvia, Inbank HP Flex Latvia, Inbank Hire Purchase Lithuania and Inbank Moki Lithuania products, in which case the default value will be displayed under the Title field. If you set a different Product code, your custom value will be overridden with the new default one, which can then be customized.|
| Minimum Order Amount | The minimum order amount for which the payment method is available. The value is defined by the product code.
For sums below this value, the payment method is not displayed.|
| Maximum Order Amount | The maximum order amount for which the payment method is available. The value is defined by the product code.
For sums above this value, the payment method is not displayed.|
| Period | The period options in months for which credit under this payment method is granted. The values are defined by the product code.|
| Additional details | The consent message displayed under the payment method at checkout. The default Additional details are defined by the Product code. You can customize it, then the default value will be displayed under the Additional details field.|
# Setting Restrictions for Inbank Payment Products
Once you've added all needed Inbank payment products to your shop you can pick and choose which products or product categories Inbank payment products are applicable to. By default, the payment products have no restrictions set.
The restrictions configuration is available at Extensions > Extensions > Payments > Pay Later Platform by Inbank. Click the  button next to the payment method you wish to set the restrictions for, the bottom of the page will then contain the needed configuration options. Once you are all set, just click Save.
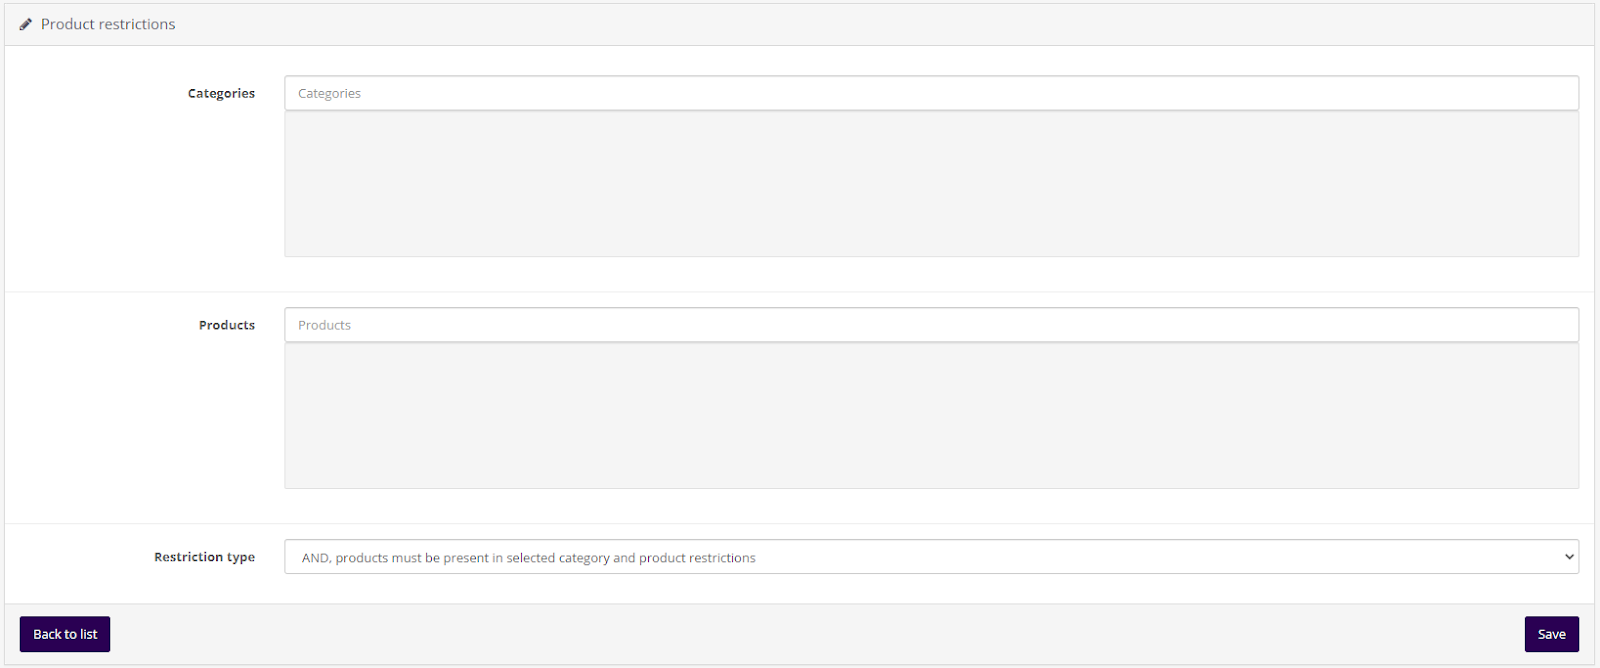
Restrictions can be set by product categories or by certain products only. In both cases you can select one or several categories/products.
The are two restriction rules available:
- AND, products must be present in selected category and product restrictions. If this rule is applied, the Inbank payment method will be available only for those products which belong to the category(s) selected in the Category restrictions and at the same time listed under the Product restrictions. If there are no products listed under Product restrictions, the payment method will be applicable to all products under the category(s) listed in the Category restrictions. This rule is selected by default.
- OR, products can be present in selected category or product restrictions. If this rule is applied, the Inbank payment method will be available for all products which belong to the category(s) selected in the Category restrictions and all products listed under the Product restrictions even if they are from different categories. If there are no products listed under Product restrictions, the payment method will be applicable to all products, regardless of their category.
# Testing
Inbank provides a dedicated staging environment for testing the integration with payment solutions. For testing purposes, you need to specify several parameters in the payment method settings at Extensions > Extensions > Payments. The same page can be accessed through a shortcut in the left side menu at Inbank > Settings.
- In the API Settings sections you need to specify the _Test API key_ and the _Test UUID_. The API key is used for authentication, while the shop key is used for building API requests. Both the shop key and UUID are provided by Inbank.
- I n the General tab of the payment product, you need to enable the _Test mode_ parameter and add the _Test product code_. The product code needs to be indicated for each financing product individually and is provided by Inbank.
For testing purposes, the system returns preconfigured decisions:
- For Inbank Hire Purchase Estonia, Inbank Split into parts Estonia, Inbank HP Flex Estonia, Inbank Hire Purchase Poland, Inbank HP Flex Poland, Inbank Hire Purchase Czechia, Inbank Hire Purchase Latvia payment products, Inbank Split into parts Latvia, Inbank HP Flex Latvia, Inbank Hire Purchase Lithuania and Inbank Moki Lithuania, positive decision is given for amounts 0 - 500, 15 000 - 16 000.
The credit application process may include an OTP code exchange via SMS. The demo environments do not send out SMS messages. If you are testing Inbank Split into parts Estonia or Inbank Split into parts Latvia payment products, the SMS message is hardcoded to value 0000.
Testing Inbank Payments Estonia products
To test the financing products in Estonia, you can safely use your own Estonian ID-code and ID-card, as the demo environment does not initiate real binding contracts. Alternatively, you can use our demo user, the identity code of which is 10101010005. Besides the identity code, you will also need a name and a phone number for authentication and signing.
To use an ID-card or Mobile-ID in the demo environment, you need to register them at:
- ID-card - https://demo.sk.ee/upload_cert/.
- Mobile-ID - https://demo.sk.ee/MIDCertsReg/.
You can also use Smart-ID by downloading the following apps:
- Android: https://play.google.com/apps/testing/com.stagnationlab.sk.
- iOS: https://testflight.apple.com/join/DoWddZjR.
To use Smart-ID for testing, your account level should be `Qualified`. You can check the account level at https://sid.demo.sk.ee/portal/login.
# Updates
There are a couple of things which can be updated in the Pay Later Platform:
- [Extension updates](#extensionupdates). The current version of the extension contains all the functionality required to offer Inbank payment methods to customers. In the future we plan on adding new payment products to the extension, as well as features to improve existing functionality. Updating the extension to the latest version will support added features and keep your store up to date with the latest enhancements from Inbank to make purchases even smoother for your customers.
- [API data updates](#apidataupdates). The extension retrieves data from Inbank regarding the conditions of payment products offered to customers. This data can undergo changes on the Inbank side. If such changes occur, product parameters should also be updated in the extension, for the customers to successfully use Inbank payment methods.
- [Extension settings updates](#extensionsettingsupdates). The payment product which is offered to customers depends on the product code set for the payment method. If at any point you need to change the product code or any other extension configurations, this can be easily done through the extension settings.
The following sections cover all the update procedures.
## Extension Updates
If a new version of the Pay Later Platform for OpenCart comes out and you want to make use of the functionality it offers, updating the extension is quick and easy. You can download the latest version of the extension from here:
- [version 3.0.0](/payment-modules/opencart/oc3/inbank.ocmod.zip) build compatible with OpenCart 3.0.0, 3.0.3.6, 3.0.3.8, 3.0.3.9, 3.0.4.0
- [version 4.0.0](/payment-modules/opencart/oc4/inbank.ocmod.zip) build compatible with OpenCart 4.0.2.x, 4.1.0.0
Do not worry about the configuration settings. While the extension is updated, all settings, including API keys, product codes, etc., are migrated into the new version of the extension.
To update OpenCart3, please follow these steps:
1. In the back office of your shop, go to Extensions > Installer section.
2. Click the Upload button in the 'Upload your extension' section of the page.
3. Select the .zip package containing the extension in the window that appears. The extension will then be uploaded to your system.
4. Go to the Extensions > Modifications menu and click Clear and Refresh.
To update OpenCart4, there are two options:
1. Uninstall the current extension and install the updated extension following the steps [here](/modules/opencart/opencart_module/#section/Installation).
2. Update the extension manually, for example using FTP. Files would need to be moved to the `root/extension/inbank/` directory.
## API Data Updates
After you set a product code for an Inbank payment method, the extension retrieves product related parameters via API from Inbank. Inbank can make changes to these data and these changes need to be synchronized with the settings of the extension.
If you have cron jobs configured in your OpenCart instance, the Pay Later Platform will check for updates and apply them to your store automatically.
Configuration parameters which can receive updates:
- Title
- Minimum order amount
- Maximum order amount
- Period
- Marketing message
- Additional details
You can also manually have the Inbank extension check for updates whenever you need. To do this just go to Extensions > Extensions > Payments > Pay Later Platform by Inbank and click Update products at the bottom of the page.
That is it! Now your extension has all the latest data from Inbank.
## Extension Settings Updates
If at any point you need to make changes to the extension settings, you can access the configuration at Extensions > Extensions > Payments > Pay Later Platform by Inbank.
To update the settings for the Pay Later Platform, click the button next to a payment method, make the required changes to the configuration and click Save.
That is it. Your payment method settings are now updated.
# Storefront Flow
This section showcases how Inbank payment methods work at checkout.
Note that the following screenshots are only demonstrational. The actual way the Inbank payment methods appear in your OpenCart store depends on the storefront theme, extension settings, the Inbank branch with which you have concluded the contract and the locale of your store.
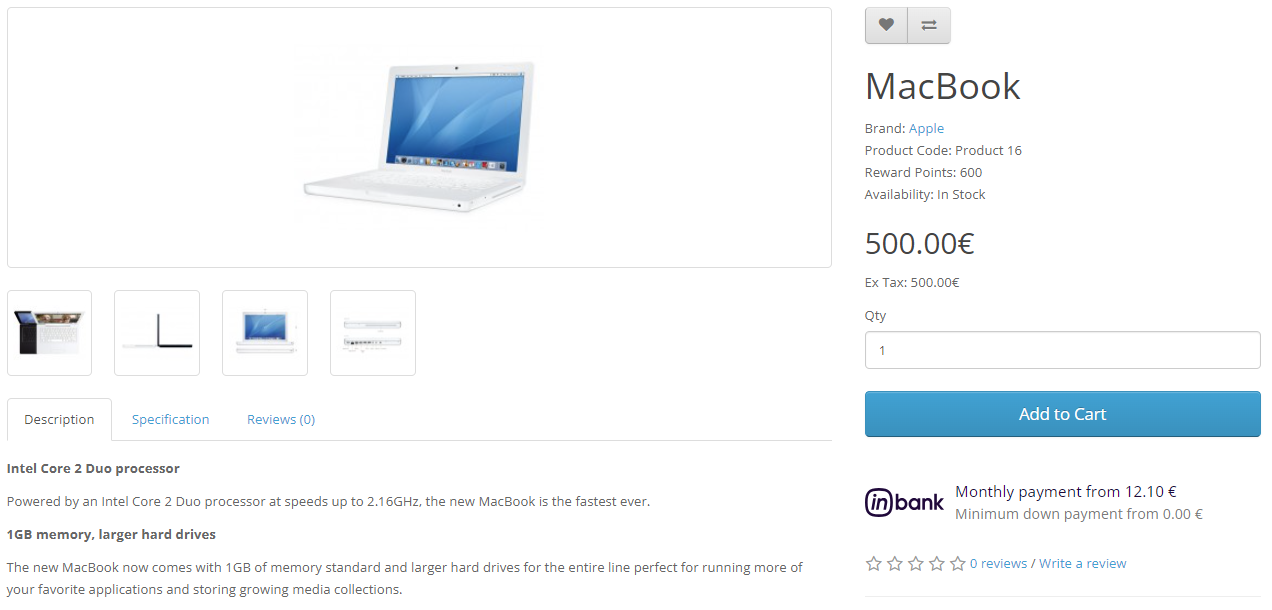
1. If enabled, Inbank monthly payment calculations appear on product pages.
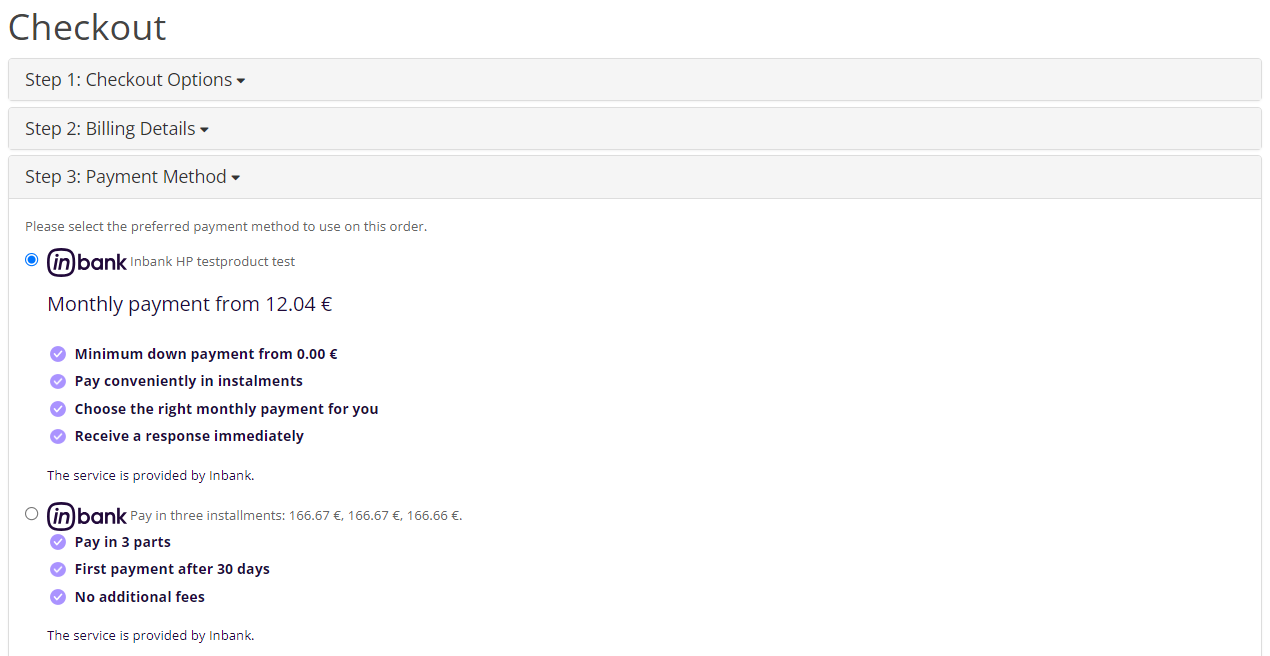
2. Inbank products appear at checkout as available payment methods:
3. Once customers choose Inbank products as their payment method, confirm the order and click Confirm order, they are redirected to the Inbank environment. Here customers go through a number of dialogs to complete the financing of the purchase.
4. After completing the procedure in Inbank environment, customers are redirected back to the shop.
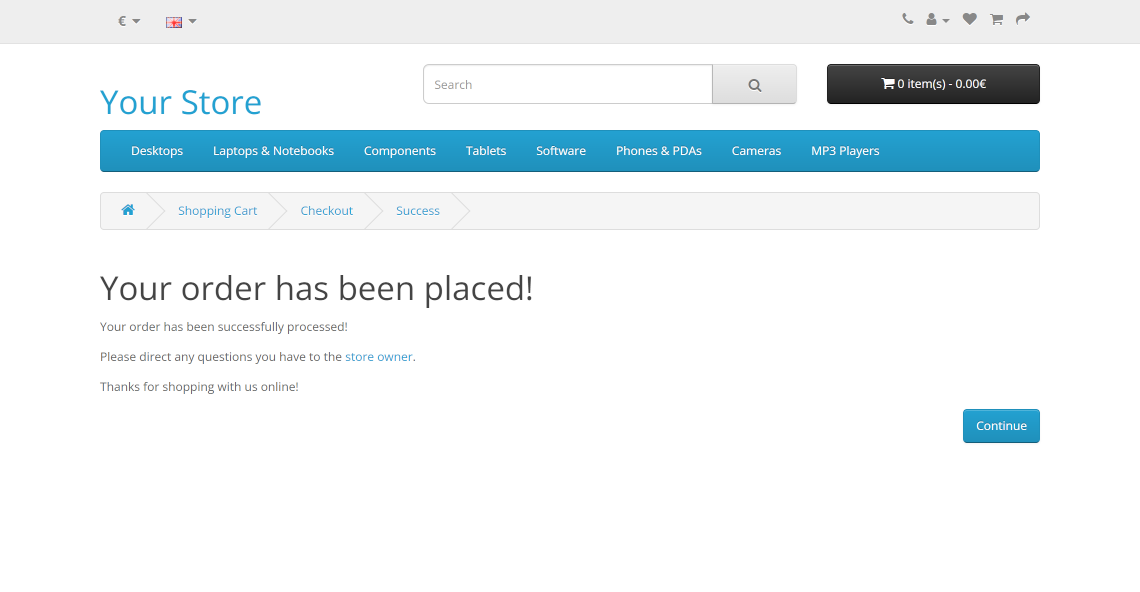
If the purchase has been financed by Inbank, the customer will be redirected to the page configured in your OpenCart instance as the payment success page. Otherwise, the customer will be redirected back to the cart.
Payment transactions can be viewed in the Sales > Orders section of the back office.
Until the credit contract has been signed by the customer and approved by Inbank for financing, it remains in status Inbank: waiting for financing.
Orders which have been successfully financed by Inbank receive status Inbank: purchase financed.
If the flow is configured to require merchant approval prior to concluding the credit contract, the order which has been approved by Inbank for financing receives status Inbank: credit granted. In this state the order awaits the merchant's approval or cancellation. If the merchant approves the contract, the order receives status Inbank: purchase financed. Contracts are approved and canceled through the Inbank Partner Portal.
## Servers
Demo environment
```
https://demo-api.inbank.ee
```
Live environment
```
https://api.inbank.ee
```
## Security
### bearerAuth
Type: http
Scheme: bearer
## Download OpenAPI description
[OpenCart 3 & 4 Extension Guide](https://docs.inbank.eu/_bundle/modules/opencart/opencart_module.yaml)